Saturday, August 18, 2007

My Favorites - Part 4 - Making Memories Tiny Boho Alpha Stickers

**Edited to add: I did confirm that these stickers have unfortunately been discontinued, so I will try to find more through my suppliers, but what's in my shop now may be it, so get them now if you're wanting some!**

So much of the scrapbooking industry is focused on the latest and greatest. Well, this favorite of mine is maybe not the latest - I think it came out at least a year ago, but I do think it is one of the greatest. Making Memories Boho Chic Tiny Alphabet Stickers - it's a mouthful, but they are cheap, fun, and versatile.


I think you all must agree, because they've been flying out the door since I got them in stock a week or two ago! These letters come in a variety of color combos, but the general idea is that they are teeny tiny letters, numbers, and punctuation stickers. Perfect for adding that fun jumbled letters look - some people call it the "ransom letter" look - to your pages and projects. They're great for adding just a few words to a layout - perhaps just a simple thought or the date of the photo or event. They are great because they add interest without competing with the bigger elements on your page. Here is an example of some lunchbox tin dividers (from a kit I designed a while back) using these stickers - the stickers were the perfect size for labeling the tabs.


I can see why these remain popular after all this time - it went from being a trend to a staple for a lot of people because they are so versatile (they go with everything), and a great value - 2 sheets of stickers (total of 468 characters) for less than $2!

These tiny alpha stickers seem to be harder to find these days, but I'll do my best to keep them in stock - find them in the sticker section of my ebay store HERE.

Tuesday, August 14, 2007

My Favorites - Part 3 - 3M Scotch ATG 714 - Adhesive Transfer Gun

Oops. So I'm a few days late! Was out of the house a lot last week and didn't get a chance to take these photos so I could blog about them. No one likes a blog entry without pictures.

So, without further ado, I present my 3rd scrapbooking favorite - the 3M Scotch ATG 714. I know what you are thinking - what is that thing, and how can she be so excited about a tape gun?

Last fall, I attended an intensive 3 day scrapbooking event, CKU (Creating Keepsakes University) when it rolled into town. I had a great time, and I loved that the event was very educationally driven - the classes moved fast, and we did a LOT of scrapping. The only problem? I had horrible adhesive issues. I had only packed a smaller sized scrapbook adhesive, and without fail, I would run out in the midst of a class - so I missed useful tips and instruction while fumbling with the refill as the class around me happily scrapped away. From then on, I was on a mission to find an adhesive that wouldn't just run out every time I made more than a few pages in a day.

Enter the ATG gun. This thing holds a 36 yard (yes that's YARDS, not feet) roll of adhesive. I was worried about it's size and weight, but this thing was designed for use by professional framers - it is amazingly ergonomic and well balanced. The size is not an issue, unless you are really tight on space going to a crop (though it seems everyone I see at those events rolls in with a giant stroller big enough to pack all my clothes into for a 3 week trip to Italy...so I don't think space would be an issue).

So, anyway, 36 yards of 1/4" wide adhesive. And guess what? The adhesive is soo much cheaper per foot than most of the other popular scrapbook adhesives out there. Those that know me, know I'm all about stuff that works well, and stuff that is a good value, so this was just a no-brainer for me. Yep, it was an investment up front because of the cost of the gun - but I made that back really fast in the savings on adhesive. And I've never run out in the midst of an intense scrapbooking session since :)

So, now on to the pictures - since those who have never used one before might have some questions loading the adhesive for the first time, I took a picture of mine opened up to demonstrate - keep in mind I was in the middle of a roll so I just tore off the used portion so I could thread the remainder onto the gun for demonstration purposes. A new roll would have the plaid liner portion at the beginning of the roll, and you would take that end and thread it into the gun.


I added the arrows to show the direction that you would thread the tape. You thread it over the first roller, then under the 2nd one, then it goes back over the adhesive roll over to the back wheel. I have a closeup of the back wheel below:

It goes into one notch and out the other notch - this catches the tape onto the back wheel so the tape from the used portion of the roll will roll up on the back wheel. After putting on the new roll, you would put the black cover back on this back wheel so that it holds the tape in place and keeps it from flopping off the wheel as it turns.

After the first or second refill, it was second nature to me to put in the refills, but I figured in case anyone was bad at spatial relations like I am, this might help the first time you use it.

I offer the ATG gun in my store HERE, and the refills HERE. The gun itself does not come with any adhesive, so you will need to purchase some before you can use it. All the ATG adhesive I carry is acid-free (not all ATG tapes are).

So, hard as it is to believe, this is one of my favorite scrapbooking purchases - no it's not as glamorous as some scrapbooking goodies, but it is a workhorse, and I love it!

Wednesday, August 08, 2007

My Favorites - Part 2 - White Uniball Signo Pen


I was downright giddy when the box arrived today. This is the white Uniball Signo pen. UM-153 for you pen geeks out there. Up until this point, I had only been able to get these pens for my own personal use - it had been discontinued in the US, and was only available from Japan, and through one of the direct sales companies. It was like Christmas when I found a couple at a Japanese stationery shop in San Francisco, but I wished that I could offer them for sale to others. Just by chance I found a supplier while looking for something else! So, as of today, these are up for grabs in my ebay store HERE.

If you've ever struggled with a sputtering, skipping, sanity-trying (ran out of words that start with 's'), white pen, you will understand my excitement regarding this pen. It is the one hyped by scrap celebs, published scrap artists, and everyday scrappers as the ultimate white pen. Smooth milky white ink, acid free, even writes smoothly on photos. Well, I've tried it. It is all true. I am finding reasons to use it on almost everything I make!

Here are a couple cards I made last weekend:

I used the pen to add the white accents to the blue stamped flower on the left card, and to accent the white bits in the flower center and add "happy birthday" on the right hand card. Here's a closer view:

I love love love this pen. I think it's a must have for anyone that is into cardmaking or scrapbooking - just perfect for doodling or accenting embellishments, or journaling. It almost makes me like the look of my own handwriting!

So, that is #2 on my favorites list (which is in no particular order). I know I missed yesterday, so I will catch up tomorrow or Friday. Stay tuned!

Monday, August 06, 2007

My Favorites - Part 1 - Blank Board Books

Photo Sharing and Video Hosting at Photobucket

As promised, today I kick off a series of "my favorites" - five of my favorite scrapbooking goodies and tools of the moment. Tune in all week to see them all!

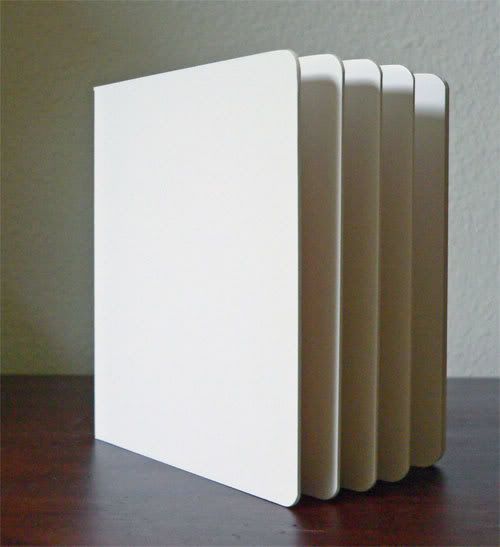
Most of the time I consider myself a very practical gal - I love things that work well, are versatile, and represent value. So, it's no surprise that my first "favorites" pick is blank board books. Reminiscent of the chunky books we read as kids - these board books are fun and adorable and can be used for so many things.

The ones I sell in my eBay store are 5"x5" acid-free, white chunky books with 6 pages (12 surfaces). I love this size because they are so do-able. Enough space to decorate with paper and embellies, and add photos, but easier and faster to finish than a regular sized scrapbook. I am infamous for having more ideas than I can finish when it comes to scrapbooking (I literally have scrapbooks that have been waiting for their last pages for years now), but with these mini sized books, I can actually do one start to finish in a couple hours - love that instant gratification!

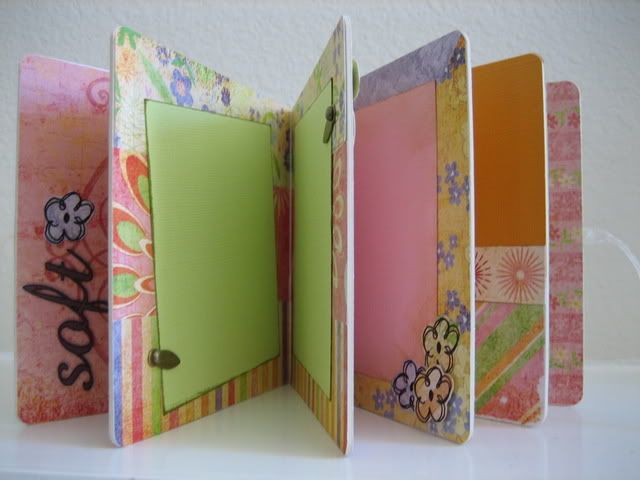
Here is a sample of one that I did themed for a baby girl (using the Oh Baby Girl papers from Basic Grey) - this mini scrapbook would be fabulous as a brag book for a new mom - everyone's always asking to see pictures of a new baby, but most moms I know are a bit busy with the feedings and diaper changes to create a giant scrapbook from the get-go!

Photo Sharing and Video Hosting at Photobucket

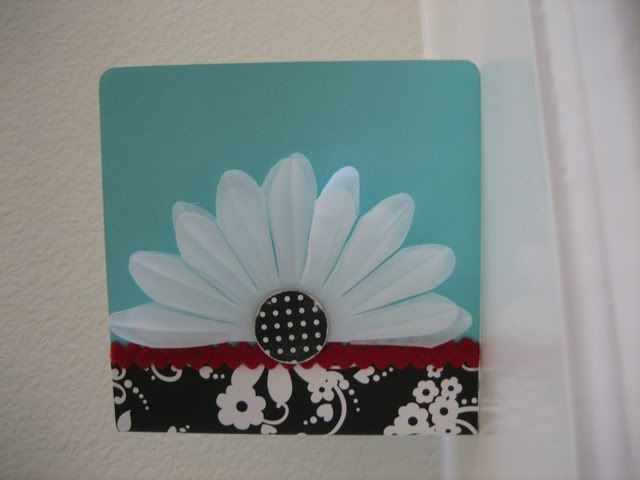
As you can see, the look just completely changes when you decorate them with different papers. This next one uses the black and white papers from Doodlebug, and the large white silk flower is Heidi Swapp.

Photo Sharing and Video Hosting at Photobucket

The basic technique for making these books is to "wallpaper" the chunky pages with your cardstock or patterned paper. I cut my base papers 4 7/8" wide x 5" tall to fit the pages. For a one-piece cover, I cut the cardstock/paper to 10 1/4" x 5" (maybe a hair longer to give you more leeway when wrapping it around the book).

Here are my tips for working with these board books -

  1. Design and build the page first and then attach the completed page to the book. I find this much easier than sticking things as I go to the book, because it is easier to work without the board book getting in the way (since it doesn't lie flat when open).
  2. Use the right adhesive for the job - people often ask what I use to keep the pages stuck to the book. Currently I am using my 3M ATG gun for that - the adhesive is really strong, and will stand up to a lot of handling. I usually apply the adhesive to the book itself (making sure to apply it right at the edges so the paper won't peel up), and then wallpaper the patterned paper or cardstock onto it. Spray adhesives also work well, and some people use a Xyron.
  3. Use a small radius corner rounder to round the edges of your paper - to get the rounded edges on your paper to match the rounded corners of the book, use a small corner punch - I use a red one from Hobby Lobby (the small size). I found that my Creative Memories corner rounder made the corners too large.
You could even use these books to make little chunky books for your kids - tell a story using photos or paper piecings, or make a book that teaches colors, animals, or numbers! I love that what you can make with these books is only limited by your imagination!

Thursday, August 02, 2007

Simpsons Silliness

Last weekend DH and I saw the Simpsons movie - it was fun and silly, just like I'd hoped. DH has also been singing "spider pig, spider pig.." for a month now.... So, how could I resist "Simpsonizing" myself? If you're looking for a way to avoid work too, here's the LINK. No real topic today, just wanted to share my new picture!

I will be doing a "my favorites" series soon covering some of my latest favorite products from my eBay store - every time I unpack a new shipment, I get all these new ideas on how to use these cool tools and yummy embellishments - so stay tuned!