Monday, March 31, 2008

New at Scrap Fancy Boutique

It's an exciting time at my eBay Store, Scrap Fancy Boutique!  Lots of new products are arriving, so I thought I'd share a few of my recent favorites (click image to see larger).

Clockwise, from bottom left:

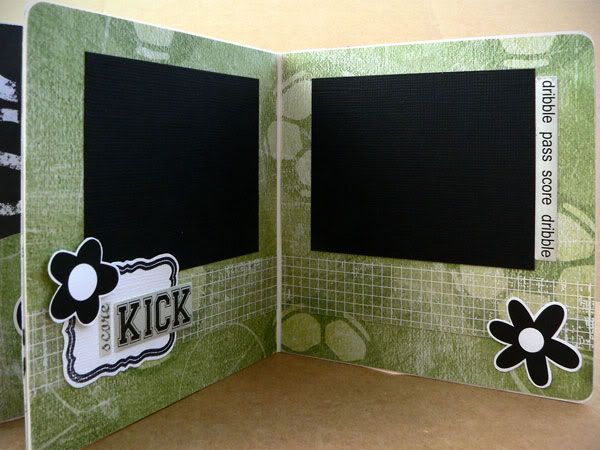
  1.  Cosmo Cricket Blackboard - Kate's Album - This is brand-new from Cosmo Cricket - chipboard with a fresh twist. This chipboard is black to the core. Tons of embellishing possibilities with this product!  Rub-ons, white pen, paint, and bling come to mind. This scalloped mini album is one of my favorites.  I also stock blackboard alphas and shapes!
  2. Making Memories 5th Avenue Collection - Elizabeth Blossoms & Buttons -  an adorable collection of buttons and felt and paper flowers that coordinate with the 5th Avenue Collection. I love that some of the flowers are solids, and some are prints! I also carry the coordinating papers which are super stylish.
  3. Heidi Swapp Butterflies Mini Mask - this isn't a brand-new product, but the butterflies are so perfect for spring layouts. I know some of you are still seeing snow, so this is a great way to bring a little Spring to your day!  Love that this product is versatile, reusable, and affordable! Don't miss the other shapes I have too!
  4. Cherry Arte Rub Ons - Her Basics - a new design from Cherry Arte (coordinates with His & Hers Basics).  Love the different flowers and butterfly designs.  I have coordinating papers in stock as well.
  5. Teresa Collins Clear Bling Ring (Dome Ring) - these rings are so glam! They are clear dome rings, and you can make your very own design by embellishing with patterned paper (adhere with diamond glaze or glossy accents), rhinestone bling, rub-ons, alcohol inks, and more! They come in 3 sizes (7, 8, and 9).  At only a buck each, you can make yourself one for every day of the week!
  6. Cherry Arte 12x12 Scrapbook Paper - Girl Power - this vibrant design is signature Cherry Arte. The double-sided design makes it easy to coordinate your layout. See more Cherry Arte papers in my store.
  7. Making Memories 5th Avenue Collection - 4x6 Spiral Journaling Book - I had this in my store earlier and it sold out quickly. Now I have it back in stock! These spiral books are really fun and versatile. Just tear out a page, stick it to your layout clustered with some embellishments, and journal away! Tons of creative uses for this product. Don't miss out on them this time around!

So, if you haven't checked out the Scrap Fancy Boutique in a while, come and browse around a bit. You never know what new goodies you might discover!

P.S. - Be sure to check in tomorrow.  I will be having a great APRIL FOOL'S ONE DAY ONLY sale (no fooling!), and blog readers will get a special code word to score some free loot with any purchase from the ebay store. Don't miss it!!

Wednesday, March 26, 2008

Weekly Scrapping Tips: Customizing your own embellishments

Today I wanted to share some ideas for customizing and creating your own scrapbooking embellishments.  Sometimes as you sit down to create, you may realize you have something that's the right style and shape but the wrong color. Or maybe, you want to add some flair and tie the embellishment in to the style of your project.  There are some fast and easy ways to do this!

Here is a board book I created for a client (yes, I DO make things other than board books LOL).  This book incorporated a lot of KI Memories' Love, Elsie stickers, so it had a really playful look.

I loved the idea of having a smattering of stars on the cover, so I used some of these American Crafts Playhouse Chipboard Stars, along with a star shaped punch (for the small orange star on the top left).  The stars were the perfect assortment of shapes and sizes, but the colors didn't all match the Love, Elsie color scheme , and they lacked the playful detailing that I was looking for.

Dressing them up proved to be really easy and fun. For the topmost star (originally pink colored), I simply swiped the star with a layer of Tombow Mono Multi Glue, then adhered a small scrap of green paper to it. I then trimmed the paper as close to the edge of the star as possible, and used some sandpaper to sand off the excess. This gave it a cool distressed look as well. Then I stamped a star onto it with brown ink (purposely letting the design run off the edge), and to finish it off I used my trusty White Signo Pen to add some faux stitching around the edges. The little orange punched star and the little green chipboard star also got the white pen treatment around the edges, and I also highlighted the heart sticker and the scalloped sticker with the same pen to give it more pop.  Yes, I really do use that pen on almost everything!

The big white chipboard star was fun to alter as well. I started with using one of my Colorbox Cats Eye Ink Pads to ink the edges. Their unique shape and small size makes it easy to really get all the sides on small embellishments like this. Next I adhered a round blue/brown Love, Elsie sticker on the star and trimmed off the excess. The orange circle on top is one that I punched out of cardstock and embellished by first stamping a design in brown ink, then adding white detailing in using the Signo Pen.

So hopefully you enjoyed this installment of weekly scrapping tips, and you have some new ideas on how to make premade embellishments work for you if they're slightly different from what you need! It definitely took longer for me to write out the steps and post this than it did to actually customize the embellishments!

Thursday, March 06, 2008

Weekly Scrapping Tips: Keeping it Simple

Ok after a slight pause we are back with the weekly scrapping tips. Last week's weekly tips post was postponed to this week because I didn't want to show it here before my client had a chance to show it to her recipient. I am excited how this album came out - I didn't have a lot of time to put it together, and I wasn't sure where I was going with it at first, but the key to pulling this one out successfully was to KEEP IT SIMPLE.

This album was for a little girl who adores playing soccer. I chose the soccer themed items first - some green soccer paper and some epoxy stickers for some dimension. At first I was worried that the two things were too masculine, and I wanted this book to be a bit girly and fun (but not too frilly since it is about soccer, after all). So originally i went in a direction with more colors - pinks and bright greens and yellow. When I laid out all the papers, I felt like there were too many colors - especially if later the photos had even more colors, with all the uniforms, etc. So, I limited the color palette to just green, black, and white and found that it all came together much more easily this way.


I found a mix of black and white papers, and mixed in the green soccer paper as a unifying theme throughout the book. One of the black & white papers was soccer themed, kind of edgy and grungy text. The others were girly patterns from Doodlebug's Black & White collection - full of flowers. I liked this contrast between the two - kept the book from being too "boy-like" yet not too girly either. To give some extra sparkle I used some Rangers Stickles Glitter Glue (in Black Diamond and Starburst) on some of the flowers.

To keep things even simpler - I cut flowers out of one of the papers and backed them with cardstock for more thickness and then used foam squares to adhere them as embellishments throughout the book. For the round ones, I just used my circle punches to punch flowers out of the same paper - instant matching without any thinking!

Because it was a 3 color scheme, it was really easy to just add matching journaling spots by stamping with black ink on white cardstock. I used these Fancy Shmancy Tags stamps by Sassafras Lass - they are so verastile and I find myself using them again and again - it's a different look each time you stamp in a different color on a different paper.
With the limited color palette it was easy to mix and cluster the embellishments, and everything looked unified. To give things a bit more pop, I inked the edges of some of the photo mats and punched circles with black ink.

On the page below, stamped one of the Sassafras Lass Tag stamps onto white cardstock and cut it out by hand as I did before, but this time instead of using it as a journaling tag, I used it as a piece to layer underneath the flower and sticker embellishments.

Hopefully I've been able to show how black and white is a very versatile color combo - combine it with a 3rd color and you have an instant easy color scheme!

Next week's featured project will be about altering embellishments in order to either match your project or to give them an extra interesting look. Don't miss it!