Lately I've been taken with the idea of inspiration boards, and the use of typography in home decor. One afternoon while cleaning some scraps off my crafting table, I realized I had just what I needed amongst my bits of stuff to create some magnetic monograms for that magnetic inspiration board I keep saying I'm going to make.
I have this habit of saving things I think I can make something out of later...little leftover scraps from my favorite scrapbook papers, bits of ribbon, paperboard jewelry boxes, and even the fridge magnets that realtors and pizza joints send!
For this project, I used the following supplies:
- Promotional magnet with last year's calendar printed on it (any flat magnetic sheet will work)
- 3 of the larger chipboard letters from my scrapbooking stash, and
- Some bits of scrap paper.
- Sanding block
- Basic Grey Precision File Set
- Adhesive
- Craft knife or scissors
The basic process for making the letters is as follows:
- Sand the printed surface of the magnetic sheet to rough it up for better adhesion.
- Trace the letter (face up) onto the face of the magnetic sheet
- Cut the letter out from the magnetic sheet using a craft knife. Cut inside the lines for best results.
- Apply adhesive to the back side of the letters. I used my ATG, making sure to go all the way to the edges, but a Xyron machine would work as well. I would not recommend a liquid glue, as it would probably slide around too much.
- Apply the face of the magnetic cut-out to the back of the letter.
- For the letters to be covered in patterned paper, turn the letters face down and trace onto the back of the paper. Cut the traced letters out and adhere to the front of the chipboard letters.
- After adhering the paper, sand the excess off. Basic Grey's Precision File Set is great because it has lots of small files to get in those little nooks and corners.
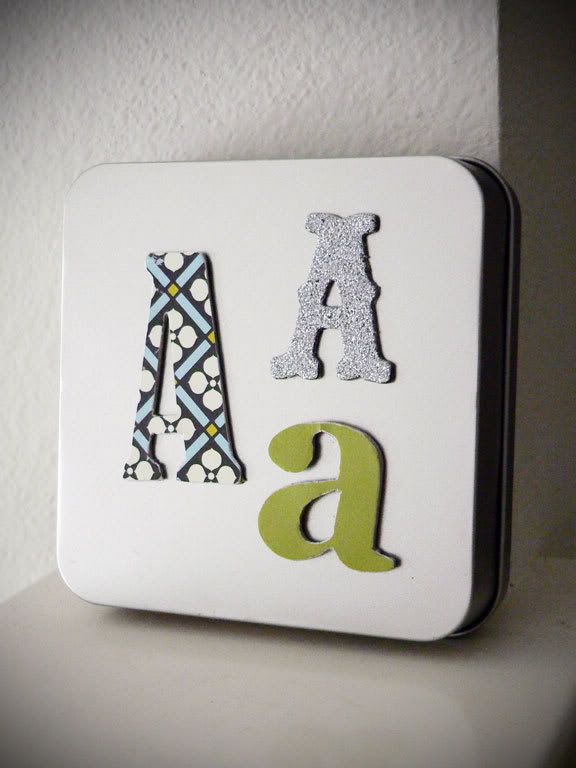
- The glittered A in the top right of the photo is actually from a Junkitz Chipboard Alpha set. All I had to do for that one was to take the letter and adhere to the magnetic sheet (as described in steps 1-5).
And that's about all there is to it! You could do tons of variations using different chipboard or grungeboard shapes, or even use a die cutting machine like a Sizzix to cut out both the magnets and the chipboard for your own custom shapes. Hopefully I've sparked some ideas for your own home decor projects!
No comments:
Post a Comment