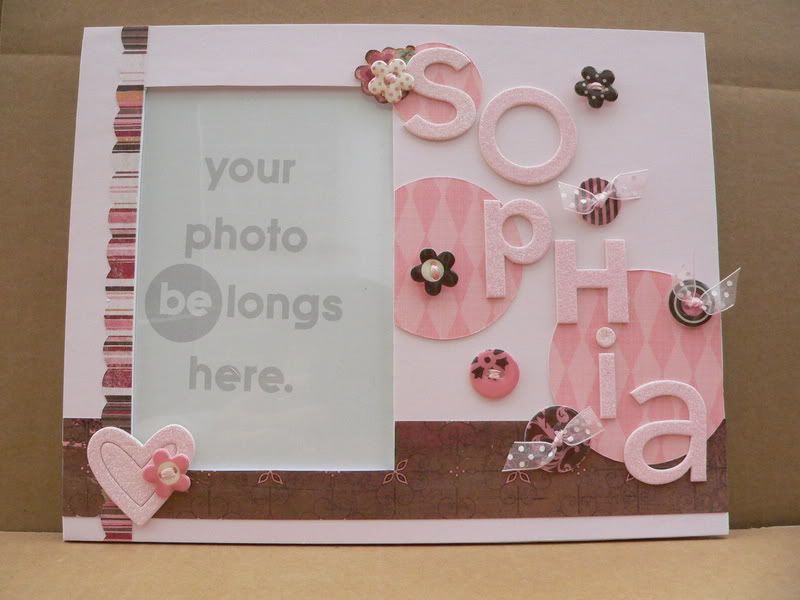
I started with a frame from Creative Imaginations' Bare Elements line, and went with a pink and brown color scheme (one of my favorites - pink and brown are Scrap Fancy's colors).
I started with the pink cardstock base layer, and then added the vertical striped strip and the horizontal brown strip. Then I added 3 pink circles (things look better in odd numbers groupings) to the frame. I let the circles run off the edges of the frame, just trimming the excess that hung over - I find that things just look more pleasing to the eye when you let them overlap or break out of the box. I liked that it was all different shades of pink, so it was subtle, but added some interest and depth to the background. To keep things looking harmonious, I kept all the circles' argyle patterns running in the same direction.
Since the frame was for a baby girl I wanted something sparkly and fun, so I used these Doodlebug chipboard alphas to personalize the frame with baby's name - the letters are pre-glittered and look like they're coated in sugar! The cute heart in the bottom left corner also comes from that set.
To add more dimension, I scattered buttons around the name, and layered on top of the heart. These pretty buttons by Making Memories are actually made of chipboard with an epoxy coating to make them glossy. These buttons are great because they are lightweight and have pretty coordinated patterns, making it really easy to spruce up a page or project. However, I am one of those people who likes her buttons threaded - though I don't always do it, it bugs me when I leave the button holes naked! So in this case I used embroidery thread and sheer ribbon to thread the button holes. This created a challenge when sticking the buttons to the frame. Normally I'd use glue dots for the job, but the thread and ribbon can cause a really lumpy backside, making it hard for the glue dot to securely stick to both the button and the frame. The answer - Pop Up Glue Dots! They are really thick, so they just mold to the lumpy backsides of the buttons, and stick securely to the frame, and add nice dimension by raising the buttons off the frame a bit! Using the right adhesive for the right job makes all the difference in the world. I think I must use over 8 different adhesives in my scrapbooking, ranging from liquid glues to acid-free, double-sided tape, depending on my needs!
Well that about does it for this project. Thanks for tuning in for my tips - hope they help! Happy scrapping!
No comments:
Post a Comment