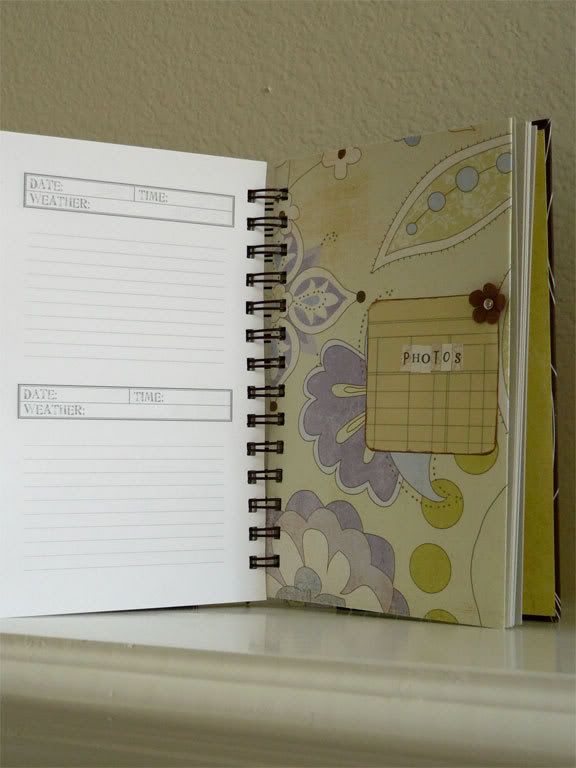
Monday, March 31, 2008

New at Scrap Fancy Boutique

It's an exciting time at my eBay Store, Scrap Fancy Boutique!  Lots of new products are arriving, so I thought I'd share a few of my recent favorites (click image to see larger).
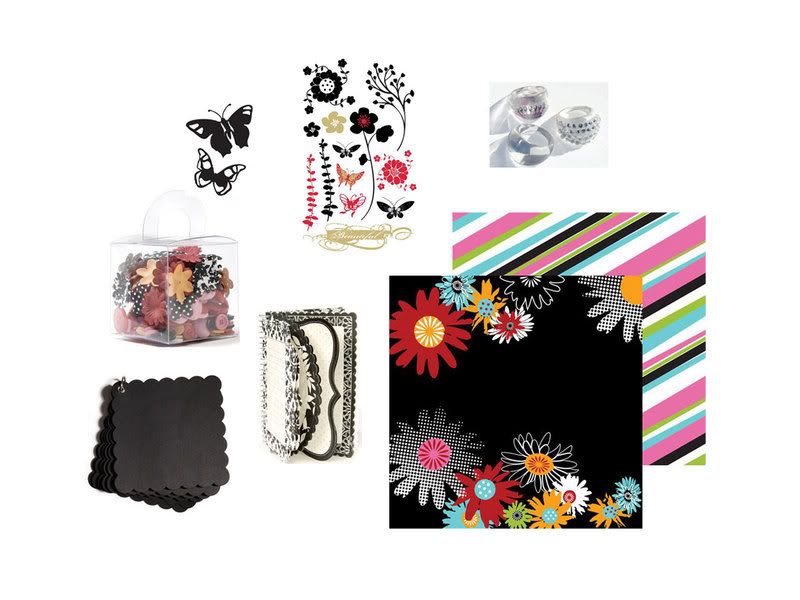
Clockwise, from bottom left:

  1.  Cosmo Cricket Blackboard - Kate's Album - This is brand-new from Cosmo Cricket - chipboard with a fresh twist. This chipboard is black to the core. Tons of embellishing possibilities with this product!  Rub-ons, white pen, paint, and bling come to mind. This scalloped mini album is one of my favorites.  I also stock blackboard alphas and shapes!
  2. Making Memories 5th Avenue Collection - Elizabeth Blossoms & Buttons -  an adorable collection of buttons and felt and paper flowers that coordinate with the 5th Avenue Collection. I love that some of the flowers are solids, and some are prints! I also carry the coordinating papers which are super stylish.
  3. Heidi Swapp Butterflies Mini Mask - this isn't a brand-new product, but the butterflies are so perfect for spring layouts. I know some of you are still seeing snow, so this is a great way to bring a little Spring to your day!  Love that this product is versatile, reusable, and affordable! Don't miss the other shapes I have too!
  4. Cherry Arte Rub Ons - Her Basics - a new design from Cherry Arte (coordinates with His & Hers Basics).  Love the different flowers and butterfly designs.  I have coordinating papers in stock as well.
  5. Teresa Collins Clear Bling Ring (Dome Ring) - these rings are so glam! They are clear dome rings, and you can make your very own design by embellishing with patterned paper (adhere with diamond glaze or glossy accents), rhinestone bling, rub-ons, alcohol inks, and more! They come in 3 sizes (7, 8, and 9).  At only a buck each, you can make yourself one for every day of the week!
  6. Cherry Arte 12x12 Scrapbook Paper - Girl Power - this vibrant design is signature Cherry Arte. The double-sided design makes it easy to coordinate your layout. See more Cherry Arte papers in my store.
  7. Making Memories 5th Avenue Collection - 4x6 Spiral Journaling Book - I had this in my store earlier and it sold out quickly. Now I have it back in stock! These spiral books are really fun and versatile. Just tear out a page, stick it to your layout clustered with some embellishments, and journal away! Tons of creative uses for this product. Don't miss out on them this time around!

So, if you haven't checked out the Scrap Fancy Boutique in a while, come and browse around a bit. You never know what new goodies you might discover!

P.S. - Be sure to check in tomorrow.  I will be having a great APRIL FOOL'S ONE DAY ONLY sale (no fooling!), and blog readers will get a special code word to score some free loot with any purchase from the ebay store. Don't miss it!!

Wednesday, March 26, 2008

Weekly Scrapping Tips: Customizing your own embellishments

Today I wanted to share some ideas for customizing and creating your own scrapbooking embellishments.  Sometimes as you sit down to create, you may realize you have something that's the right style and shape but the wrong color. Or maybe, you want to add some flair and tie the embellishment in to the style of your project.  There are some fast and easy ways to do this!

Here is a board book I created for a client (yes, I DO make things other than board books LOL).  This book incorporated a lot of KI Memories' Love, Elsie stickers, so it had a really playful look.

I loved the idea of having a smattering of stars on the cover, so I used some of these American Crafts Playhouse Chipboard Stars, along with a star shaped punch (for the small orange star on the top left).  The stars were the perfect assortment of shapes and sizes, but the colors didn't all match the Love, Elsie color scheme , and they lacked the playful detailing that I was looking for.

Dressing them up proved to be really easy and fun. For the topmost star (originally pink colored), I simply swiped the star with a layer of Tombow Mono Multi Glue, then adhered a small scrap of green paper to it. I then trimmed the paper as close to the edge of the star as possible, and used some sandpaper to sand off the excess. This gave it a cool distressed look as well. Then I stamped a star onto it with brown ink (purposely letting the design run off the edge), and to finish it off I used my trusty White Signo Pen to add some faux stitching around the edges. The little orange punched star and the little green chipboard star also got the white pen treatment around the edges, and I also highlighted the heart sticker and the scalloped sticker with the same pen to give it more pop.  Yes, I really do use that pen on almost everything!

The big white chipboard star was fun to alter as well. I started with using one of my Colorbox Cats Eye Ink Pads to ink the edges. Their unique shape and small size makes it easy to really get all the sides on small embellishments like this. Next I adhered a round blue/brown Love, Elsie sticker on the star and trimmed off the excess. The orange circle on top is one that I punched out of cardstock and embellished by first stamping a design in brown ink, then adding white detailing in using the Signo Pen.

So hopefully you enjoyed this installment of weekly scrapping tips, and you have some new ideas on how to make premade embellishments work for you if they're slightly different from what you need! It definitely took longer for me to write out the steps and post this than it did to actually customize the embellishments!

Thursday, March 06, 2008

Weekly Scrapping Tips: Keeping it Simple

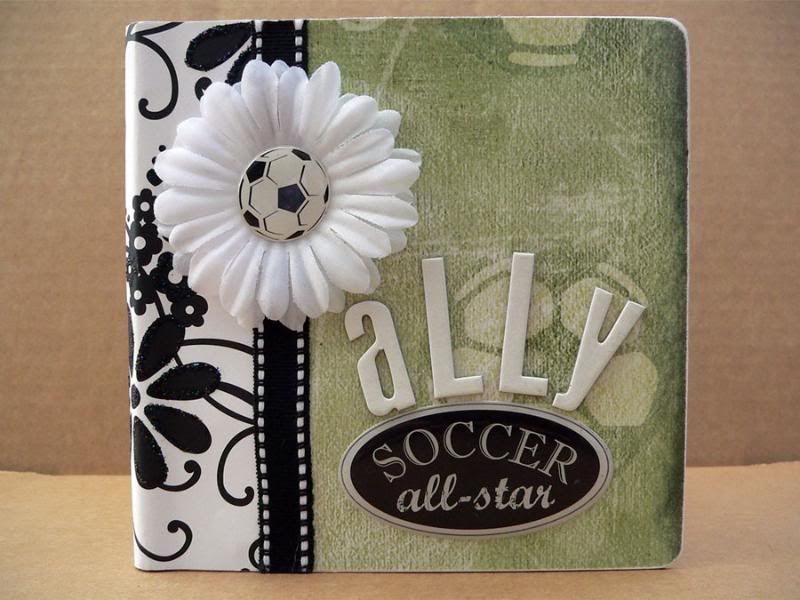
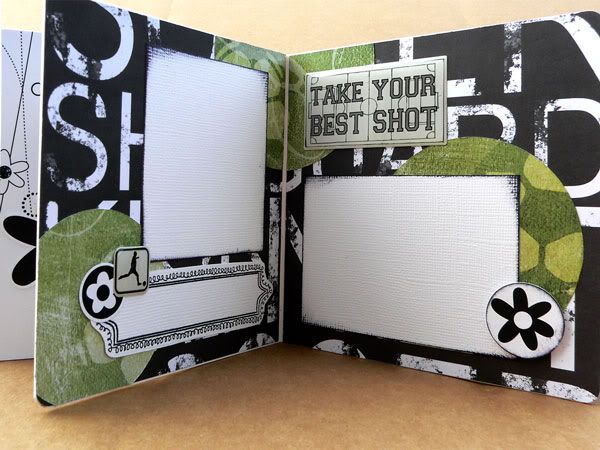
Ok after a slight pause we are back with the weekly scrapping tips. Last week's weekly tips post was postponed to this week because I didn't want to show it here before my client had a chance to show it to her recipient. I am excited how this album came out - I didn't have a lot of time to put it together, and I wasn't sure where I was going with it at first, but the key to pulling this one out successfully was to KEEP IT SIMPLE.

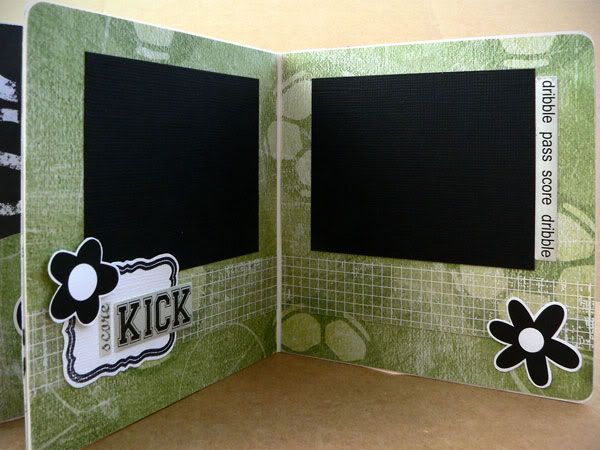
This album was for a little girl who adores playing soccer. I chose the soccer themed items first - some green soccer paper and some epoxy stickers for some dimension. At first I was worried that the two things were too masculine, and I wanted this book to be a bit girly and fun (but not too frilly since it is about soccer, after all). So originally i went in a direction with more colors - pinks and bright greens and yellow. When I laid out all the papers, I felt like there were too many colors - especially if later the photos had even more colors, with all the uniforms, etc. So, I limited the color palette to just green, black, and white and found that it all came together much more easily this way.


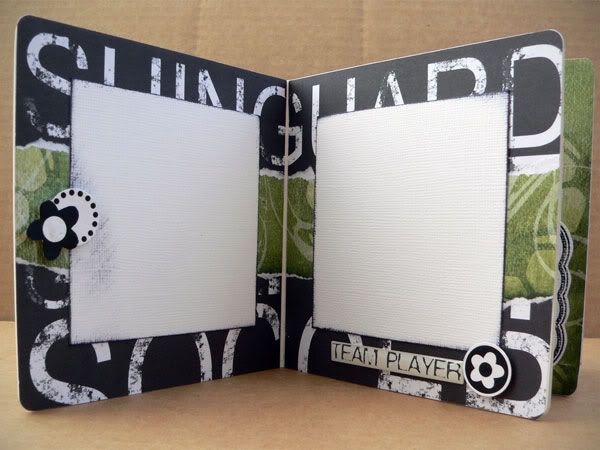
I found a mix of black and white papers, and mixed in the green soccer paper as a unifying theme throughout the book. One of the black & white papers was soccer themed, kind of edgy and grungy text. The others were girly patterns from Doodlebug's Black & White collection - full of flowers. I liked this contrast between the two - kept the book from being too "boy-like" yet not too girly either. To give some extra sparkle I used some Rangers Stickles Glitter Glue (in Black Diamond and Starburst) on some of the flowers.

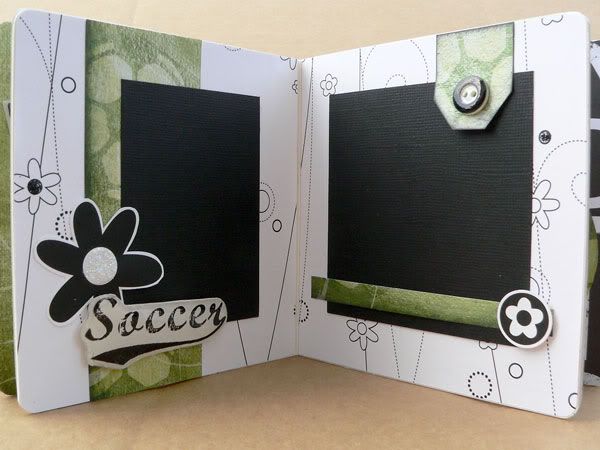
To keep things even simpler - I cut flowers out of one of the papers and backed them with cardstock for more thickness and then used foam squares to adhere them as embellishments throughout the book. For the round ones, I just used my circle punches to punch flowers out of the same paper - instant matching without any thinking!

Because it was a 3 color scheme, it was really easy to just add matching journaling spots by stamping with black ink on white cardstock. I used these Fancy Shmancy Tags stamps by Sassafras Lass - they are so verastile and I find myself using them again and again - it's a different look each time you stamp in a different color on a different paper.
With the limited color palette it was easy to mix and cluster the embellishments, and everything looked unified. To give things a bit more pop, I inked the edges of some of the photo mats and punched circles with black ink.

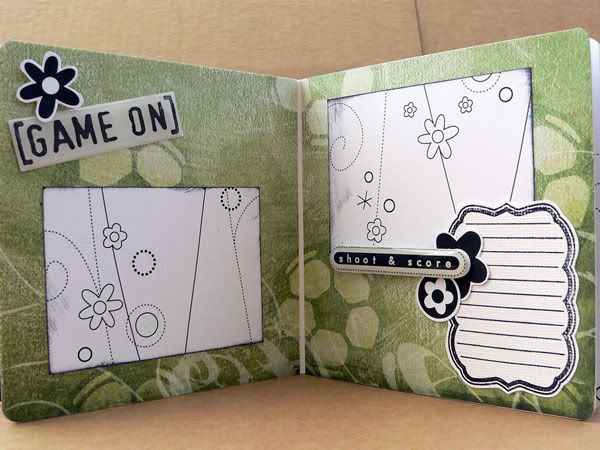
On the page below, stamped one of the Sassafras Lass Tag stamps onto white cardstock and cut it out by hand as I did before, but this time instead of using it as a journaling tag, I used it as a piece to layer underneath the flower and sticker embellishments.

Hopefully I've been able to show how black and white is a very versatile color combo - combine it with a 3rd color and you have an instant easy color scheme!

Next week's featured project will be about altering embellishments in order to either match your project or to give them an extra interesting look. Don't miss it!

Thursday, February 21, 2008

Weekly Scrapping Tips: Buttons Buttons!

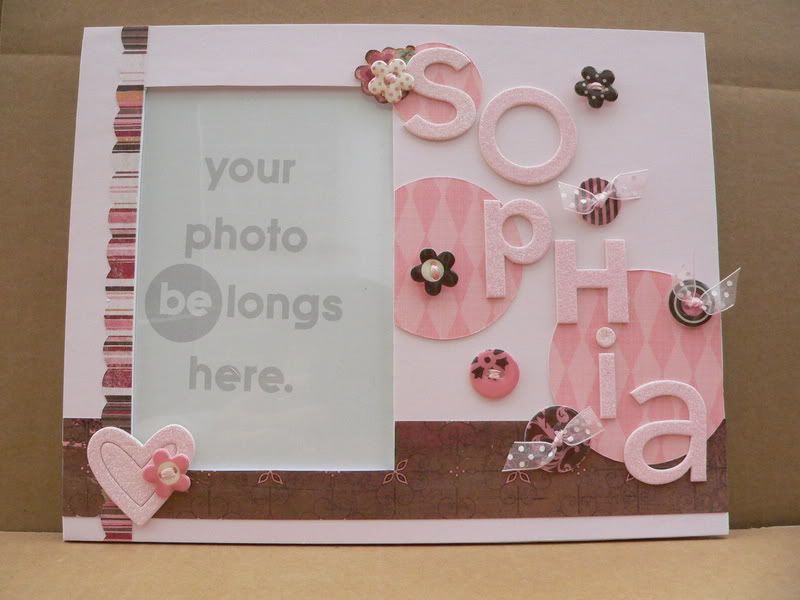
One of the services I offer at Scrap Fancy is custom scrapbooking, meaning customers commission me to make a scrapbook or an altered project for them. This is one of the projects I just completed, an altered frame for a baby shower gift.


I started with a frame from Creative Imaginations' Bare Elements line, and went with a pink and brown color scheme (one of my favorites - pink and brown are Scrap Fancy's colors).

I started with the pink cardstock base layer, and then added the vertical striped strip and the horizontal brown strip. Then I added 3 pink circles (things look better in odd numbers groupings) to the frame. I let the circles run off the edges of the frame, just trimming the excess that hung over - I find that things just look more pleasing to the eye when you let them overlap or break out of the box. I liked that it was all different shades of pink, so it was subtle, but added some interest and depth to the background. To keep things looking harmonious, I kept all the circles' argyle patterns running in the same direction.

Since the frame was for a baby girl I wanted something sparkly and fun, so I used these Doodlebug chipboard alphas to personalize the frame with baby's name - the letters are pre-glittered and look like they're coated in sugar! The cute heart in the bottom left corner also comes from that set.

To add more dimension, I scattered buttons around the name, and layered on top of the heart. These pretty buttons by Making Memories are actually made of chipboard with an epoxy coating to make them glossy. These buttons are great because they are lightweight and have pretty coordinated patterns, making it really easy to spruce up a page or project. However, I am one of those people who likes her buttons threaded - though I don't always do it, it bugs me when I leave the button holes naked! So in this case I used embroidery thread and sheer ribbon to thread the button holes. This created a challenge when sticking the buttons to the frame. Normally I'd use glue dots for the job, but the thread and ribbon can cause a really lumpy backside, making it hard for the glue dot to securely stick to both the button and the frame. The answer - Pop Up Glue Dots! They are really thick, so they just mold to the lumpy backsides of the buttons, and stick securely to the frame, and add nice dimension by raising the buttons off the frame a bit! Using the right adhesive for the right job makes all the difference in the world. I think I must use over 8 different adhesives in my scrapbooking, ranging from liquid glues to acid-free, double-sided tape, depending on my needs!

Well that about does it for this project. Thanks for tuning in for my tips - hope they help! Happy scrapping!

Wednesday, February 20, 2008

What Color are You?

Take this test!
You're blue — the most soothing shade of the spectrum. The color of a clear summer sky or a deep, reflective ocean, blue has traditionally symbolized trust, solitude, and loyalty. Most likely a thoughtful person who values spending some time on your own, you'd rather connect deeply with a few people than have a bunch of slight acquaintances. Luckily, making close friends isn't that hard, since people are naturally attracted to you — they're soothed by your calming presence. Cool and collected, you rarely overreact. Instead, you think things through before coming to a decision. That level-headed, thoughtful approach to life is patently blue — and patently you!

Wednesday, February 13, 2008

Weekly Scrapping Tutorial & Tips: *Gasp* The Fashionista makes a themed album...

I know, I know! I've been MIA so long you probably think I disappeared for good. Well, as it so happens, DH and I sold the house and moved since the last post, so after settling in and getting my ebay store back up and running, I have returned to blogland.

To make amends, I thought I would start a new weekly blog feature: scrapping tutorial and tips (p.s. - I reserve the right to rename it when I come up with something more imaginative)!

Once a week I will post a project and share hints and tips with you. The idea is not to give you a step-by-step recreation of the specific project, but rather to share techniques or tips, and a bit of my creative process so that you can use them in lots of different projects.

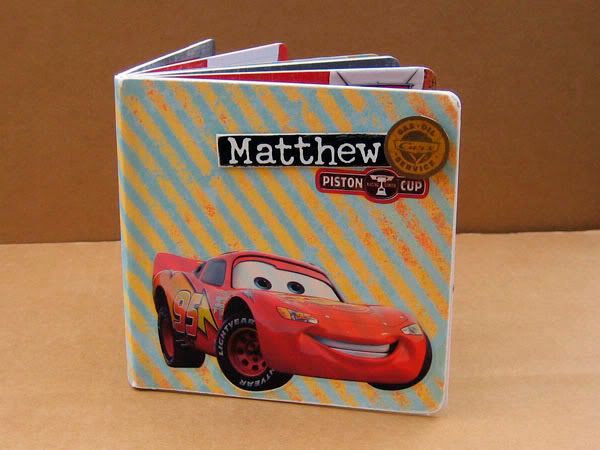
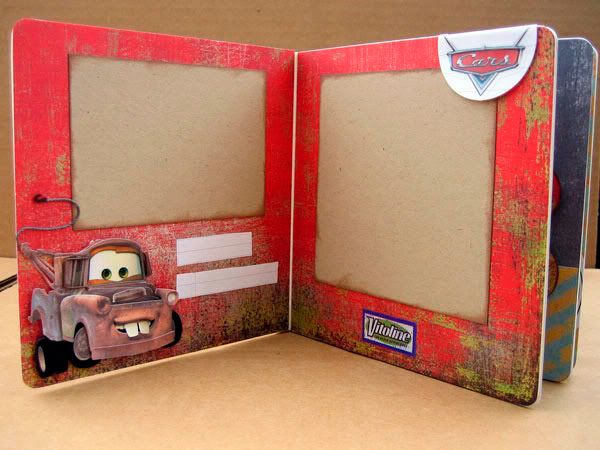
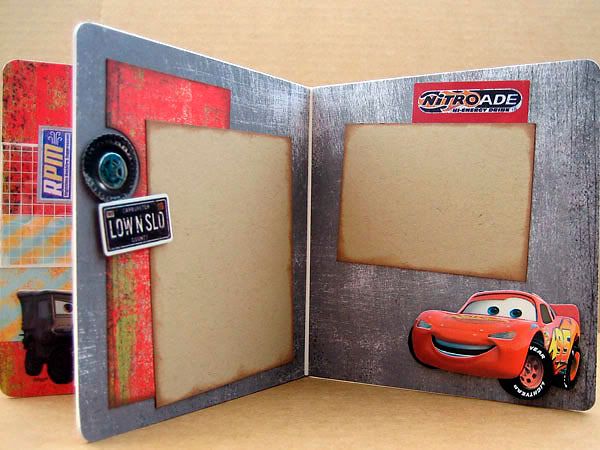
This week's project is a board book I made for a little boy who loves the movie "Cars." This was actually somewhat of a stretch for me, because I'm not a big themed-product scrapbooker. I have been dubbed a scrapping fashionista for my love of the latest sophisticated embellishments and artistic papers, so I really enjoyed the challenge here of incorporating the theme while not letting it override all sense of design and creativity!

First I chose the products I wanted to use, starting with the themed stickers. Using the colors and style of these stickers, I chose some papers - red and gray distressed paper to coordinate with Lightning McQueen. This striped paper brightened things up and gave a sense of movement. I used distressed papers because much of the movie was set in Radiator Springs, which was run down and dusty.

I put Lightning McQueen on the bottom of the cover, to give it some visual weight there, and I clustered the boy's name with some stickers in the top corner of the cover, so that those elements would not just be scattered randomly. Note that Lightning McQueen is facing toward the opening of the book - I find this helps direct your eye toward opening the book. The direction of the striped paper also reinforces this.

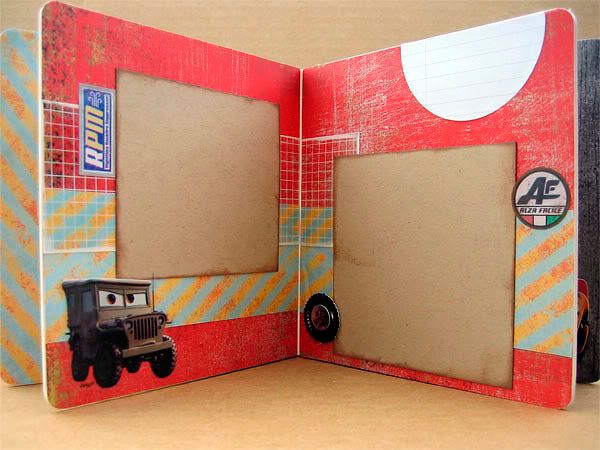
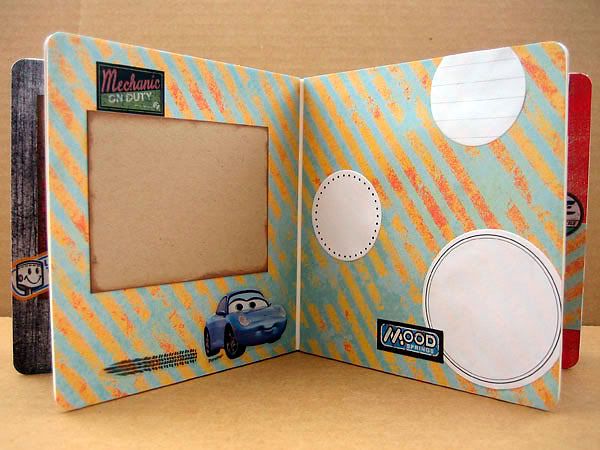
I continued the distressed look by inking the edges of the kraft photo mats. Using the same color scheme throughout the book, and using some of the same papers from page to page keeps everything feeling cohesive and coordinated in a mini album.

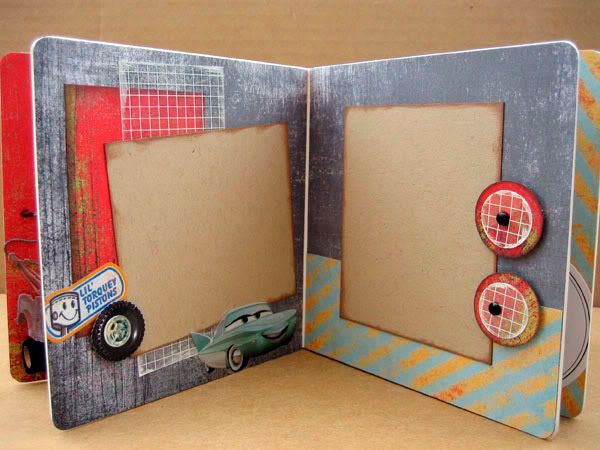
Creating a visual triangle helps the pages feel unified, and tells the eyes where to go. In the above photo, notice the red paper and the grid transparency on the left side are repeated in the two circles on the right page.

I couldn't find Cars themed scrapbook paper when I was shopping, which turned out to be a blessing. I think themed stickers AND themed paper could have been overwhelming here. The papers I used actually have nothing to do with cars or the movie at all. The stripe is from My Minds Eye, and the red and grey papers are from Basic Grey's Scarlet's Letter collection. The grid transparency is a Hambly overlay. You wouldn't think to use them on a scrapbook with a Disney animated movie theme, but they work! Keep an open mind when shopping for paper and embellishments - try seeing beyond the theme or the collection the papers come from when searching for the perfect match for your project.

I kept all the cars in the book on the bottom, so the pages would feel grounded. Floating cars all over would just say "sticker sneeze" and feel too overtly themed, I think.


Well that's it for my first scrapping tutorial feature! Hope you found it useful and interesting. If you have any questions or feedback, I'd love to hear it!

Tuesday, October 23, 2007

This line should be called "Droolworthy"...

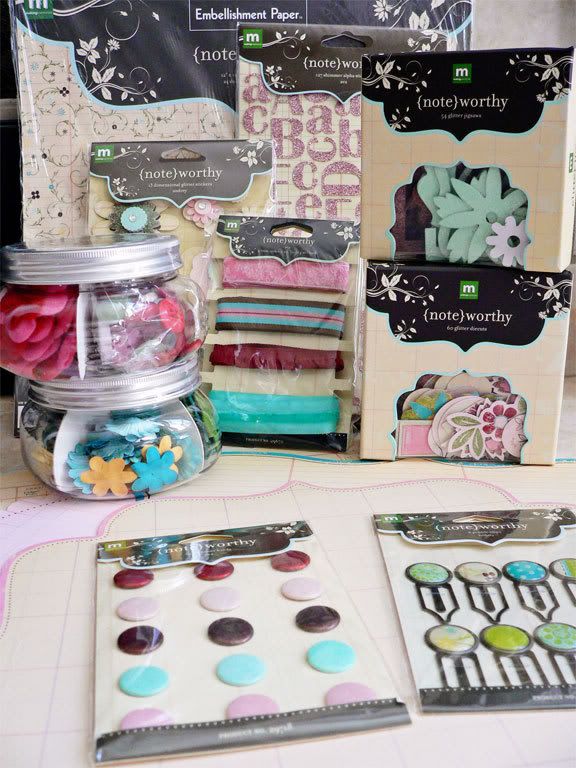
I am talking about Making Memories' Noteworthy collection. I will let you in on a little secret. Sometimes as a retailer of scrapbooking goods, you can get a little blase about products - I mean, when it's your job to know about all the latest and greatest, it takes more to really wow you. You've seen it all (and lately a lot of it looks the same). But this...this line is special. It actually made my heart go pitter patter when it arrived (ok, that sounds so lame. but really, it is cute).

It took all the willpower I could muster to not open up all the packages and touch all the yummy ribbons and the felt flowers and the pebble clips--I took a photo instead.

The colors are just gorgeous - a pretty, pretty mix of pink, aqua, cream, brown, and cranberry. And every piece has so much detail. The die cut papers have scalloped edges, the brads are shimmery, the trims have ruffles and other great details, the chipboard is all glittery and fun.

My favorites have to be the shaped papers (seen underneath the brads and pebble clips) and the embellishment jars, which have coordinating buttons, felt flowers, and paper flowers all in one adorable reusable jar!

I nearly went permanently cross-eyed uploading them all to my ebay store (unfortunately being store owner isn't all fondling ribbons and drooling over paper), but now they are all up there for your enjoyment! So shop for the Noteworthy collection HERE before I squirrel them all away for myself!!

Tuesday, October 09, 2007

A Creepy Crafty Halloween

When I was a kid, I didn't really get into Halloween. My parents were sort of health nuts and hated the idea of me eating candy and sweets-for my birthdays they got me carrot cake as some kind of strange compromise - "hey at least carrot cake has VEGGIES in it." Needless to say, they were not big Halloween people - they had my little 6 year old brain convinced that Halloween was a time that kids went haywire on a sugar buzz, and got kidnapped by bogeymen. So yeah, not so into Halloween as a kid.

Fast forward a indeterminable number of years, and I've become a convert - after visiting DH's cousin on the east coast in October a few years back, I'm a huge fan of fall, and pumpkins. Our neighbors down the street love decorating their house and yard with gruesome and silly decorations for Halloween, DH's friend gives Halloween gifts to people, and Martha Stewart (love her or hate her) puts out some seriously neat Halloween craft ideas in a special issue magazine, and I think it's all really fun. So yeah, I guess I am a late-blooming Halloween fan!

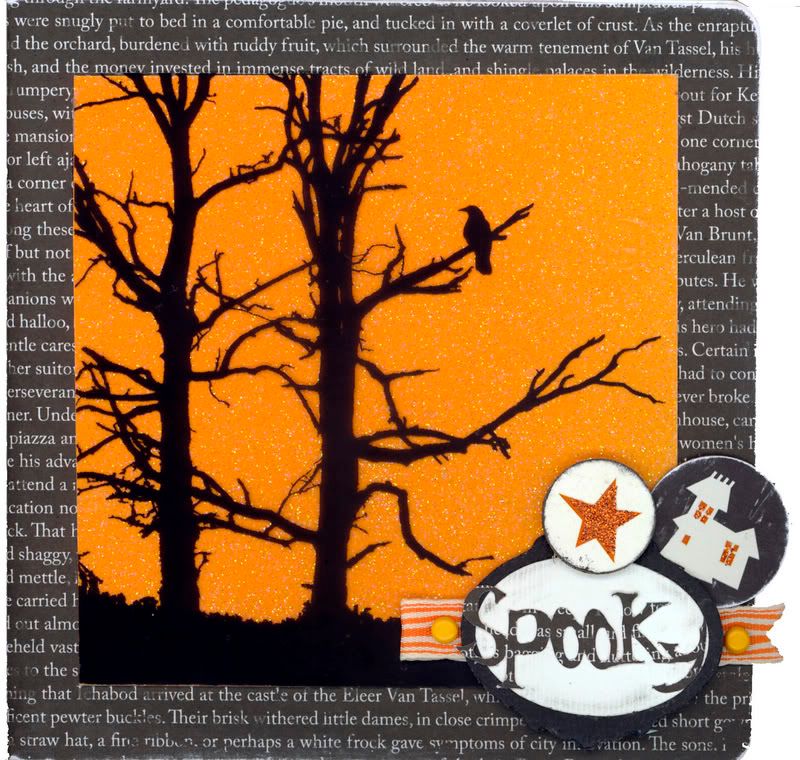
To celebrate this realization, I've created a limited edition "Spooky" board book kit:


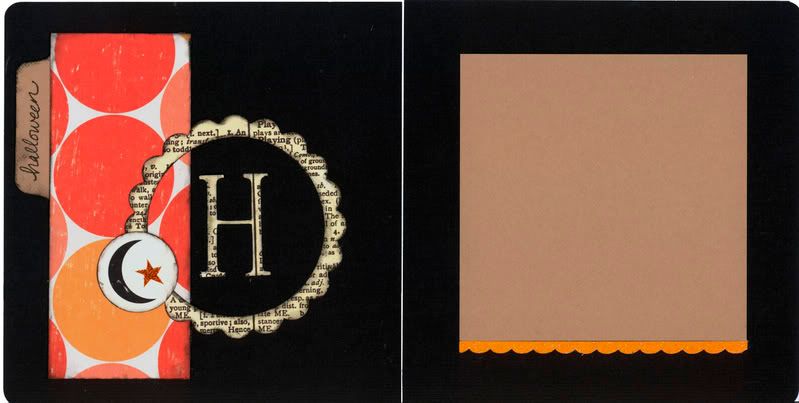
An example of the inside pages:


The kit comes with all the materials (5x5 board book, cardstock, patterned paper, die-cuts, embellishments, ribbon) and color photos and instructions so making this project for yourself is super easy. All you need are adhesives, basic tools (like scissors and a paper trimmer), and photos! I had so much fun creating this one - it's packed with fabulous stuff like glittered and flocked papers, and exclusive transparencies. Perfect for halloween photos of kids of any age! Available now in my eBay Store HERE.

I also have a section of the store devoted to Halloween scrapbook supplies if you are in search of papers, stickers, brads, etc. - LINK.

I hope everyone has fun preparing for a creepy, crawly, spooky, and *safe* Halloween!!

Wednesday, September 05, 2007

The Elusive 5th Favorite - Bind it All machine!

So supposedly I was doing a "5 favorite scrapbooking items" list, and everyone reading this blog was probably thinking I couldn't count since I stopped at 4. But I didn't forget - there is a 5th!

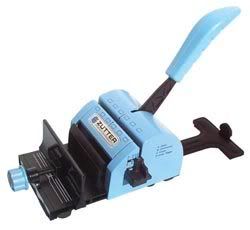
My favorite tool as of late has been this nifty thing called a Bind-it-All.

Simply put, it is a little personal bookbinder - it punches holes in paper and chipboard (or even plastic and CD's if you're feeling adventurous), and binds them with wire coils. The books look just like the professionally made notebooks and journals with the wire bindings that you see at bookstores and stationery shops. Very cool. Besides making your own scrapbooks in any size you like, you can bind your own cookbooks, journals, kids' artwork, etc. - the possibilities are limitless!

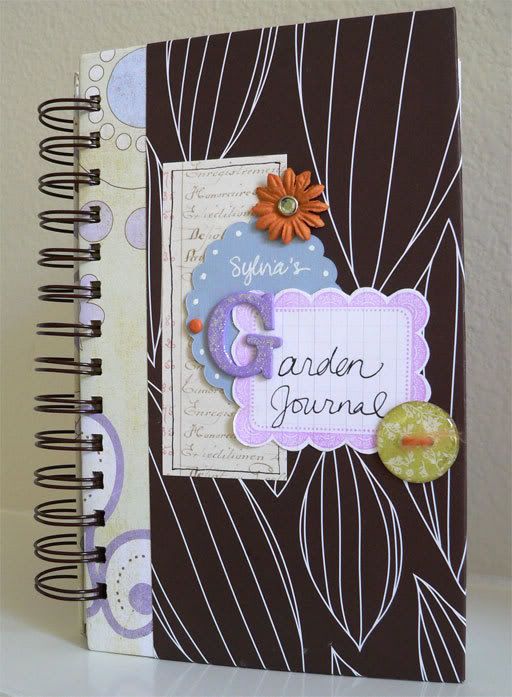
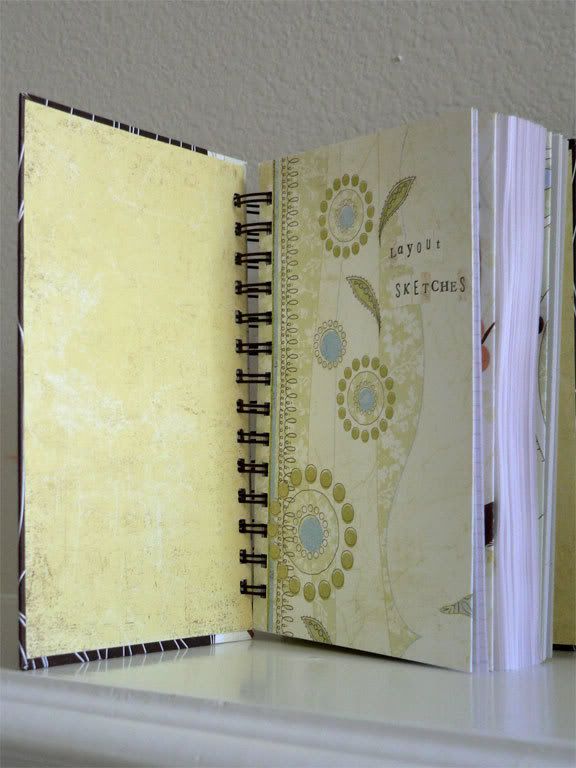
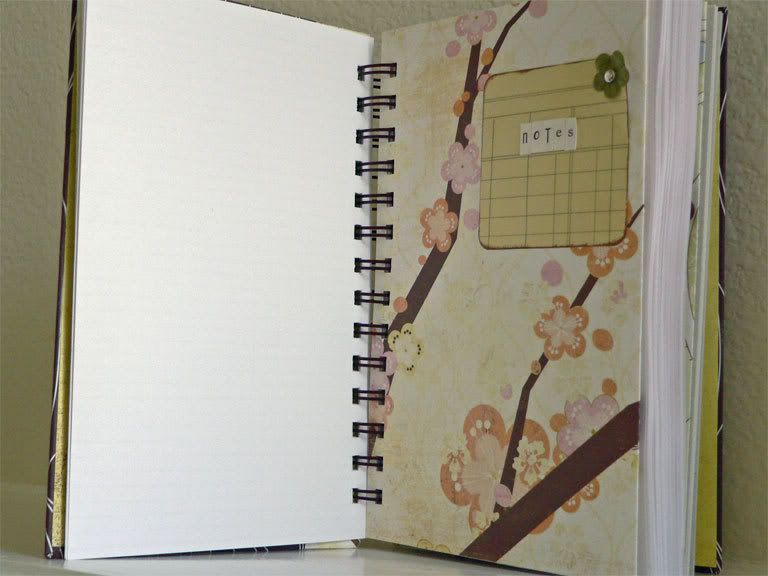
I wanted to show what you could do with it, so I took pictures of a book I made this week for a friend's birthday. She's an avid gardener, so I decided to design her a gardening journal where she can sketch designs, take notes and keep photos. I love how it turned out - I was able to incorporate a bunch of different papers of my choosing. For the covers, I covered pieces of chipboard with patterned paper on both sides, and then punched the holes with the BIA:

I used some paper from the brand new American Crafts Metropolitan line (loving this line!) and the LilyKate collection from Basic Grey. One of my favorite elements was the scalloped tag - I stamped a tag from Sassafras Lass' Fancy Schmancy Tags clear stamp set onto graph paper and cut around the edges- so cute! The dividers were fairly simple - just used some of those tiny boho letters (see previous post) and some ledger journaling spots from Heidi Swapp, along with little Prima flowers.


I've already got ideas for at least 2 more projects in the near term using the BIA - I'm itching to make a mini brag book to showcase little 3x4" photos!

I carry the Bind-it-All as well as the owire bindings and chipboard accessories at my ebay store - check it out - I highly recommend it!!

Saturday, August 18, 2007

My Favorites - Part 4 - Making Memories Tiny Boho Alpha Stickers

**Edited to add: I did confirm that these stickers have unfortunately been discontinued, so I will try to find more through my suppliers, but what's in my shop now may be it, so get them now if you're wanting some!**

So much of the scrapbooking industry is focused on the latest and greatest. Well, this favorite of mine is maybe not the latest - I think it came out at least a year ago, but I do think it is one of the greatest. Making Memories Boho Chic Tiny Alphabet Stickers - it's a mouthful, but they are cheap, fun, and versatile.


I think you all must agree, because they've been flying out the door since I got them in stock a week or two ago! These letters come in a variety of color combos, but the general idea is that they are teeny tiny letters, numbers, and punctuation stickers. Perfect for adding that fun jumbled letters look - some people call it the "ransom letter" look - to your pages and projects. They're great for adding just a few words to a layout - perhaps just a simple thought or the date of the photo or event. They are great because they add interest without competing with the bigger elements on your page. Here is an example of some lunchbox tin dividers (from a kit I designed a while back) using these stickers - the stickers were the perfect size for labeling the tabs.


I can see why these remain popular after all this time - it went from being a trend to a staple for a lot of people because they are so versatile (they go with everything), and a great value - 2 sheets of stickers (total of 468 characters) for less than $2!

These tiny alpha stickers seem to be harder to find these days, but I'll do my best to keep them in stock - find them in the sticker section of my ebay store HERE.

Tuesday, August 14, 2007

My Favorites - Part 3 - 3M Scotch ATG 714 - Adhesive Transfer Gun

Oops. So I'm a few days late! Was out of the house a lot last week and didn't get a chance to take these photos so I could blog about them. No one likes a blog entry without pictures.

So, without further ado, I present my 3rd scrapbooking favorite - the 3M Scotch ATG 714. I know what you are thinking - what is that thing, and how can she be so excited about a tape gun?

Last fall, I attended an intensive 3 day scrapbooking event, CKU (Creating Keepsakes University) when it rolled into town. I had a great time, and I loved that the event was very educationally driven - the classes moved fast, and we did a LOT of scrapping. The only problem? I had horrible adhesive issues. I had only packed a smaller sized scrapbook adhesive, and without fail, I would run out in the midst of a class - so I missed useful tips and instruction while fumbling with the refill as the class around me happily scrapped away. From then on, I was on a mission to find an adhesive that wouldn't just run out every time I made more than a few pages in a day.

Enter the ATG gun. This thing holds a 36 yard (yes that's YARDS, not feet) roll of adhesive. I was worried about it's size and weight, but this thing was designed for use by professional framers - it is amazingly ergonomic and well balanced. The size is not an issue, unless you are really tight on space going to a crop (though it seems everyone I see at those events rolls in with a giant stroller big enough to pack all my clothes into for a 3 week trip to Italy...so I don't think space would be an issue).

So, anyway, 36 yards of 1/4" wide adhesive. And guess what? The adhesive is soo much cheaper per foot than most of the other popular scrapbook adhesives out there. Those that know me, know I'm all about stuff that works well, and stuff that is a good value, so this was just a no-brainer for me. Yep, it was an investment up front because of the cost of the gun - but I made that back really fast in the savings on adhesive. And I've never run out in the midst of an intense scrapbooking session since :)

So, now on to the pictures - since those who have never used one before might have some questions loading the adhesive for the first time, I took a picture of mine opened up to demonstrate - keep in mind I was in the middle of a roll so I just tore off the used portion so I could thread the remainder onto the gun for demonstration purposes. A new roll would have the plaid liner portion at the beginning of the roll, and you would take that end and thread it into the gun.


I added the arrows to show the direction that you would thread the tape. You thread it over the first roller, then under the 2nd one, then it goes back over the adhesive roll over to the back wheel. I have a closeup of the back wheel below:

It goes into one notch and out the other notch - this catches the tape onto the back wheel so the tape from the used portion of the roll will roll up on the back wheel. After putting on the new roll, you would put the black cover back on this back wheel so that it holds the tape in place and keeps it from flopping off the wheel as it turns.

After the first or second refill, it was second nature to me to put in the refills, but I figured in case anyone was bad at spatial relations like I am, this might help the first time you use it.

I offer the ATG gun in my store HERE, and the refills HERE. The gun itself does not come with any adhesive, so you will need to purchase some before you can use it. All the ATG adhesive I carry is acid-free (not all ATG tapes are).

So, hard as it is to believe, this is one of my favorite scrapbooking purchases - no it's not as glamorous as some scrapbooking goodies, but it is a workhorse, and I love it!

Wednesday, August 08, 2007

My Favorites - Part 2 - White Uniball Signo Pen


I was downright giddy when the box arrived today. This is the white Uniball Signo pen. UM-153 for you pen geeks out there. Up until this point, I had only been able to get these pens for my own personal use - it had been discontinued in the US, and was only available from Japan, and through one of the direct sales companies. It was like Christmas when I found a couple at a Japanese stationery shop in San Francisco, but I wished that I could offer them for sale to others. Just by chance I found a supplier while looking for something else! So, as of today, these are up for grabs in my ebay store HERE.

If you've ever struggled with a sputtering, skipping, sanity-trying (ran out of words that start with 's'), white pen, you will understand my excitement regarding this pen. It is the one hyped by scrap celebs, published scrap artists, and everyday scrappers as the ultimate white pen. Smooth milky white ink, acid free, even writes smoothly on photos. Well, I've tried it. It is all true. I am finding reasons to use it on almost everything I make!

Here are a couple cards I made last weekend:

I used the pen to add the white accents to the blue stamped flower on the left card, and to accent the white bits in the flower center and add "happy birthday" on the right hand card. Here's a closer view:

I love love love this pen. I think it's a must have for anyone that is into cardmaking or scrapbooking - just perfect for doodling or accenting embellishments, or journaling. It almost makes me like the look of my own handwriting!

So, that is #2 on my favorites list (which is in no particular order). I know I missed yesterday, so I will catch up tomorrow or Friday. Stay tuned!

Monday, August 06, 2007

My Favorites - Part 1 - Blank Board Books

Photo Sharing and Video Hosting at Photobucket

As promised, today I kick off a series of "my favorites" - five of my favorite scrapbooking goodies and tools of the moment. Tune in all week to see them all!

Most of the time I consider myself a very practical gal - I love things that work well, are versatile, and represent value. So, it's no surprise that my first "favorites" pick is blank board books. Reminiscent of the chunky books we read as kids - these board books are fun and adorable and can be used for so many things.

The ones I sell in my eBay store are 5"x5" acid-free, white chunky books with 6 pages (12 surfaces). I love this size because they are so do-able. Enough space to decorate with paper and embellies, and add photos, but easier and faster to finish than a regular sized scrapbook. I am infamous for having more ideas than I can finish when it comes to scrapbooking (I literally have scrapbooks that have been waiting for their last pages for years now), but with these mini sized books, I can actually do one start to finish in a couple hours - love that instant gratification!

Here is a sample of one that I did themed for a baby girl (using the Oh Baby Girl papers from Basic Grey) - this mini scrapbook would be fabulous as a brag book for a new mom - everyone's always asking to see pictures of a new baby, but most moms I know are a bit busy with the feedings and diaper changes to create a giant scrapbook from the get-go!

Photo Sharing and Video Hosting at Photobucket

As you can see, the look just completely changes when you decorate them with different papers. This next one uses the black and white papers from Doodlebug, and the large white silk flower is Heidi Swapp.

Photo Sharing and Video Hosting at Photobucket

The basic technique for making these books is to "wallpaper" the chunky pages with your cardstock or patterned paper. I cut my base papers 4 7/8" wide x 5" tall to fit the pages. For a one-piece cover, I cut the cardstock/paper to 10 1/4" x 5" (maybe a hair longer to give you more leeway when wrapping it around the book).

Here are my tips for working with these board books -

  1. Design and build the page first and then attach the completed page to the book. I find this much easier than sticking things as I go to the book, because it is easier to work without the board book getting in the way (since it doesn't lie flat when open).
  2. Use the right adhesive for the job - people often ask what I use to keep the pages stuck to the book. Currently I am using my 3M ATG gun for that - the adhesive is really strong, and will stand up to a lot of handling. I usually apply the adhesive to the book itself (making sure to apply it right at the edges so the paper won't peel up), and then wallpaper the patterned paper or cardstock onto it. Spray adhesives also work well, and some people use a Xyron.
  3. Use a small radius corner rounder to round the edges of your paper - to get the rounded edges on your paper to match the rounded corners of the book, use a small corner punch - I use a red one from Hobby Lobby (the small size). I found that my Creative Memories corner rounder made the corners too large.
You could even use these books to make little chunky books for your kids - tell a story using photos or paper piecings, or make a book that teaches colors, animals, or numbers! I love that what you can make with these books is only limited by your imagination!

Thursday, August 02, 2007

Simpsons Silliness

Last weekend DH and I saw the Simpsons movie - it was fun and silly, just like I'd hoped. DH has also been singing "spider pig, spider pig.." for a month now.... So, how could I resist "Simpsonizing" myself? If you're looking for a way to avoid work too, here's the LINK. No real topic today, just wanted to share my new picture!

I will be doing a "my favorites" series soon covering some of my latest favorite products from my eBay store - every time I unpack a new shipment, I get all these new ideas on how to use these cool tools and yummy embellishments - so stay tuned!

Tuesday, June 26, 2007

Can I say I love the San Francisco Bay Area?

A couple weeks ago DH and I took a trip to the SF Bay area - he needed to go for work, so we added a few days so that we could see San Francisco and spend some time with friends in Berkeley. I thoroughly enjoyed tasting all the amazing seasonal/locally grown foods, drinking excellent wines, discovering Trader Joe's, reveling in the joy of non-sticky weather, and soaking up that artsy vibe that San Francisco has. Like any good scrapbooker, I sought out paper/arts & crafts stores.

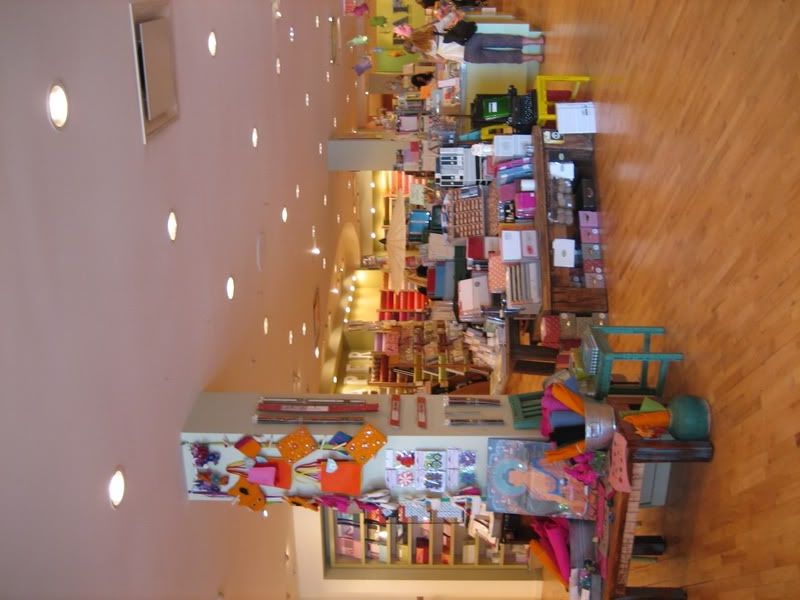
Ok, so one of the favorite stores I found was a chain (Paper Source) - but look at it! Even with San Francisco real estate as precious as it is, look at the beautiful spacious well-lit layout of the place!


So, I definitely drooled and spent time looking at all the beautiful embellishments and ribbons and papers. I got tons of inspiration there. If I were to have a brick and mortar store, it would look like this in my fantasy.

But I love having an online business. It's flexible, and I can work from home and not deal with idling in traffic - I just recently opened up my own ebay store Scrap Fancy Boutique to add to the custom scrapbooking and personalized invitations/cards that I create. I'm so excited about getting to share some of my favorite scrapbooking embellishments and tools there, and I'm getting new stuff quite frequently. So, if you're a crafter in need of a Bind-it-all machine (I've been waiting years for someone to come up with this!) or some fun glittery chipboard alphabet letters, check it out! If you squint real hard you can imagine that my store looks like the picture above ;)

Tuesday, April 17, 2007

Seeing the beauty around us...

I came across this article titled "Pearls Before Breakfast," from The Washington Post--LINK HERE--they set up an informal social experiment to see if people commuting to work would recognize greatness if it were just in an everyday context. They had Joshua Bell, one of the greatest violinists of our time, play incognito like a street performer just outside a D.C. Metro station during the morning rush hour. Out of over 1000 people that passed him in 43 minutes, almost no one stopped to listen or showed signs of even noticing he was there. It was so interesting, and though I wasn't surprised at the results, it was saddening nonetheless.

It is something to ponder--even though I consider myself to be a "stop and smell the roses" type of person, I know there are times I am just rushing about, trying to "be more productive," getting irritated at anything that might slow me down.

This is one of the greatest gifts of scrapbooking--it encourages us to slow down, to contemplate, to recognize the beauty or significance of what is around us. To document it.

Some may find it ridiculous that my husband Steve takes photos of the process of baking his ciabattas etc., but there is something beautiful and fun about making REAL food--creamy, flavorful crusty bread..with carbs and calories and all, and I am thrilled that he is documenting it (and the yummy results), and I intend to write about it and scrapbook it--it is about seeing the beauty around us.

Monday, December 18, 2006

Wow, where have I been?

Goodness, it has been over a month since my last post?? I am a bad blogger! Guess "be a better blogger" will be one of my new year's resolutions...

So I switched over to the new blogger, and suddenly I have become aware that I had a handful of comments that I had not approved for publishing--it never told me they existed even though I had it set to--eek! So, if I have any blog readers left after this perceived snub of the commenters, I sheepishly apologize for unwittingly ignoring your comments, and have set it up so this doesn't happen again!

The holiday card ordering rush has passed (thank you SO much to all of you who ordered or told your friends about me), and I am now getting ready for the holidays and thinking up ideas for the business in the coming year. I was sick with a horrible stomach bug during Thanksgiving, so I missed the whole kickoff to the holiday season. I usually love dragging out all the Christmas decorations the day after I've gorged myself to the gills, and remembering all the ornaments and past holidays as Steve and I set up the tree and decorate the house. This year, I was only able to feebly watch TV from bed and drink Powerade for the 4-5 days surrounding Thanksgiving. Somehow, missing the kickoff made it hard to get into the holiday spirit--we replaced our beloved runty 4 1/2 foot "Charlie Brown Christmas Tree" with a 7 1/2 foot monster this year, and while we were excited about having a prelit tree that was taller than us, that thing fought, scratching and clawing the whole way. It took a while to finish setting it up because I only had enough motivation to fight that tree for an hour each day! Finally got the tree up and hung the sparse collection of ornaments (remember, we only had a 4 1/2 footer before!). Somehow that helped immensely--having this big ol lit up fake tree in our house just made it start feeling like the holidays. We miss our Charlie Brown tree, but this one's growing on us. Maybe next year I will be super motivated and create a Christmas tree miniforest, LOL.

I am really looking forward to having friends and family descend upon us and getting to spend quality time with people I don't see everyday (amidst a backdrop of comfort foods and stockings and glittery ornaments and favorite movies). Love this time of year...

Tuesday, November 14, 2006

10 Tips for Taking Great Holiday Card Photos

Do you dread getting all the kids together for a holiday card photo shoot every year? Here are 10 tips to help you get the best results, stress free.

  1. Dress for Success- When choosing outfits for the little one to wear, steer clear of any busy patterns, no matter how cute the fuzzy bears all over her sweater are. Patterns distract attention away from the cute faces of your kids, and make the photos busy. Avoid dark red if you are going to have black and white pictures--it comes out very dark, creating a lot of contrast and loss of detail. White, denim, and neutrals are classic choices of professional photographers for a reason.
  2. Say No to Cluttered Backgrounds- Try to take your photos in a setting that is free of distracting details. Avoid the kids' toy strewn playroom and if you're outside, look out for trees growing out of the kids head when you frame your shot. Textured concrete walls, a pond, or uniform foliage make for good backgrounds. Taking some time to find a good location will make a huge difference in your photos.
  3. Flash is evil- Whenever possible, use natural light. Flash washes people out and makes everything look flat and unnatural. Get outside in the late afternoon light--it is beautiful and warm this time of year. Avoid taking pictures at high noon on a sunny day--the shadows and glare will make the photos harsh. Take pictures on a cloudy day or in open shade, such as that under a shady tree or an open carport. Indoors, try to find a window that lets in indirect light (there should be no harsh shadows on the ground), and place your subjects beside it. Or, go the opposite route and experiment with photos of your baby playing with a string of lights in a dark room without using the flash.
  4. Focus- Be smart about how you use your camera's autofocus. To focus on most point and shoots, press the button halfway down and hold to focus before pressing all the way down to take the picture. Usually the camera focuses on what is in the center. You can compose interesting shots with your subject off center by first framing the shot with your subect in the middle and pressing the button halfway to focus. Then, still holding the button halfway down, move your camera sideways and reframe the shot the way you want it. When you are satisfied, finish pressing the button all the way down to take the picture.
  5. Have fun, relax!- put on some fun music, get your subjects relaxed. Photos taken when the kids are comfortable will look less stiff and posed, and will show more of their personalities.
  6. Get on the level- many people stand fixed in one spot and try to snap all their pictures from that one vantage point. Instead, try and get on the same level with your kids, and move around to try to get an interesting angle.
  7. The Eyes are the Windows to the Soul- ever hear that saying? Try making sure that the eyes of your subject are in focus. This can give your photo a lot of impact. One favorite trick of photographers is to capture the reflected light in their subjects' eyes--called catchlights. This really makes the eyes pop. Lighting your subject from the side (such as seating them next to a window) will often give you catchlights.
  8. Get in close- This has 2 parts: get in close to your subjects, and have your subjects get in close to each other. In photos, even small distances between people can look like big gaps. Get your kids to squeeze in close together, and fill the frame with them. This is a great thing especially if you can't find a super scenic backdrop for your photos. Getting in close minimizes distracting backgrounds, and puts the focus on those cute faces.
  9. Observe- If you have more than one child, try standing back and letting them interact with each other instead of making them pose stiffly. Sure this may not result in the most traditional portrait, but you have a chance at capturing their true personalities and relationship in your photos.
  10. Take lots of shots- Ever notice how a professional photographer takes tons of shots? Even the pros need to take a lot of shots to get those few stunning ones. So, experiment, and take pictures from different angles and keep shooting. Many cameras come with a burst mode that will snap a series of shots in quick succession. Often times the most real expressions and interactions will come after the initial photo is taken--make sure to capture them!
I hope these tips will get you thinking outside the box and inspire you to take stunning portraits of your kids. It doesn't require fancy equipment or lighting--just a little planning and time to try out some different ideas.

If you are looking for some original holiday photo card designs, check out the cards on my site: www.scrapfancy.com/cards. I do free basic photo enhancement, free conversion to black and white or sepia, and free online proofs! Order now from the comfort of home before all the holiday chaos!

Monday, October 23, 2006

They are ready!!!

So, I have feverishly been working on this project for a few weeks now, even pressing my poor husband into working on the website, and I am finally ready to unveil it….

Personalized holiday photo cards! They are now available through my website:

http://www.scrapfancy.com/cards

I am so excited about this, and I am really happy with how the designs came out. Some are very clean and graphic, while others are “scrapbook inspired”—they are much more intricately layered (digitally, of course), and “dimensional” than most other photo cards—lots of great shading and details on these. I wanted very much to make a line that was different, one that would make photos shine and look really special.

Many thanks to my friends who have given me their firstborn (or at least photos of said firstborns) for my samples. It’s so much easier designing when you’ve got adorable pictures at your fingertips! Thanks guys!

Best things about these cards:

  1. The designs!
  2. The cards are printed at a lab that caters to pro photographers. I got the test prints back, and I am happy to report they are awesome—way beyond what the glazed-eye clerk puts out at Walmart!! The colors and clarity are great.
  3. They are customized by me, which means there is a pair of human eyes deciding how best to crop and enhance the photos, and how best to position the type, which is VERY unlike the automated photo kiosks at discount stores
  4. You can order from home—no waiting in line at the kiosk while your darling kiddo throws random items into your basket and the lady in front of you rotates her picture round and round, and after ten minutes decides she wants to start over with a different picture for her card.

And there is an exciting bonus--order by November 15 to be entered into a drawing for a pre-designed mini scrapbook (holiday themed)—this is a super cute chunky board book album that you just add your pictures to! So check out the site now and you can finish your cards before the frantic holiday chaos begins, and perhaps you may win!

Wednesday, October 18, 2006

What month is it??

So you know how gearing up for the holidays just starts earlier and earlier every year? I mean I remember my friend making an offhand remark in July one time about how she had to stock the store she worked at with their new Christmas and holiday items that weekend. Incredible.

I have never been one of those people who has Christmas planned out (gifts purchased, cards written and sent out, house decorated) way in advance. But this year, for Scrap Fancy, I have done something waay out of character and thought ahead about the holidays. So, my brain is really confused, because I am totally immersed in planning something really awesome related to the holidays--in my mind, it is somewhere in late November and early December...I have to keep looking at the calendar to see what day and month it is.

So, be on the lookout for an announcement in the coming days--I am so very excited about what I've been working on and can't wait to show everyone!